Configuring SonicWALL Internet Security Appliances
Firewall Analyzer supports most of the versions of SonicWALL Firewall devices. Carry out the following configuration depending upon your requirement.
To get Live reports using Syslog
Enable 'default' (syslog) format in the SonicWALL firewall to get live reports using syslog
Configuring SonicWALL To Direct Log Streams
- Log in to the SonicWALL appliance
- Click Log on the left side of the browser window
- Select the Log Settings tab
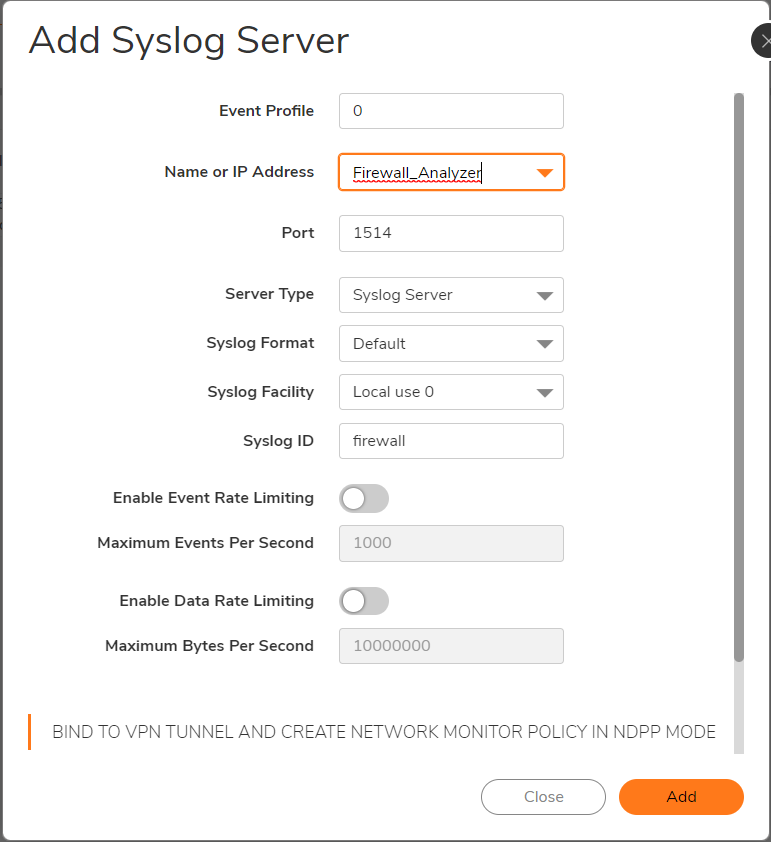
- Type the IP address of the Firewall Analyzer server in the Syslog Server text box
- Click Update at the bottom of the browser window
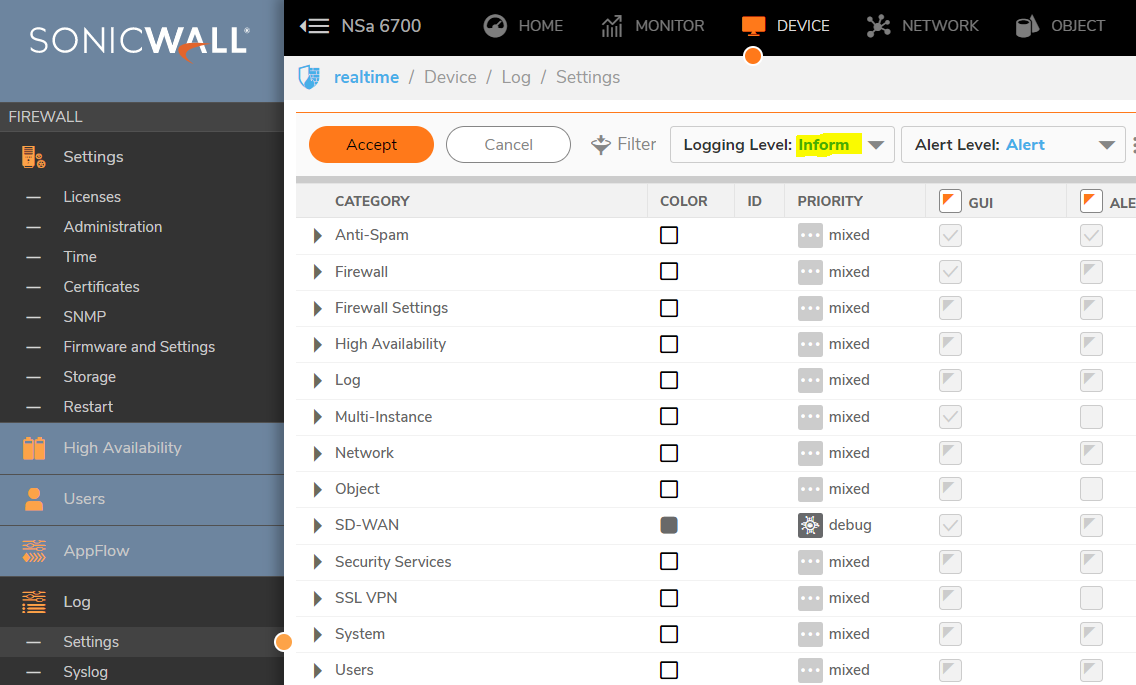
Configuring SonicWALL Logging Level
- Log in to the SonicWALL appliance
- Click Log on the left side of the browser window
- Select the View tab
- Select the Logging Level as Informational from the combo box
- Click Update at the bottom of the browser window
Whenever you create an access rule in the SonicWALL Firewall, ensure that 'Enable Logging' check box is selected for the particular rule.
Restart the SonicWALL appliance for the changes to take effect.
Configuring SonicWALL to get 'IPFIX with extension' flow information
Firewall Analyzer supports the IPFIX flow collection from SonicWALL devices. SonicWALL provides netflow with extended features called 'IPFIX with extension'. This flow support is available in SonicOS version 5.8 and above.
| Note: |
If syslog is already being forwarded from SonicWALL device and if you configure IPFIX, the SonicWALL device will be added as a new device in Firewall Analyzer with Firewall's LAN IP address as device name.
If you configure IPFix flow logs, only Traffic and Security reports are supported.
|
IPFIX with Extensions Configuration Procedures
To configure IPFIX with extensions flow reporting, follow the steps listed below.
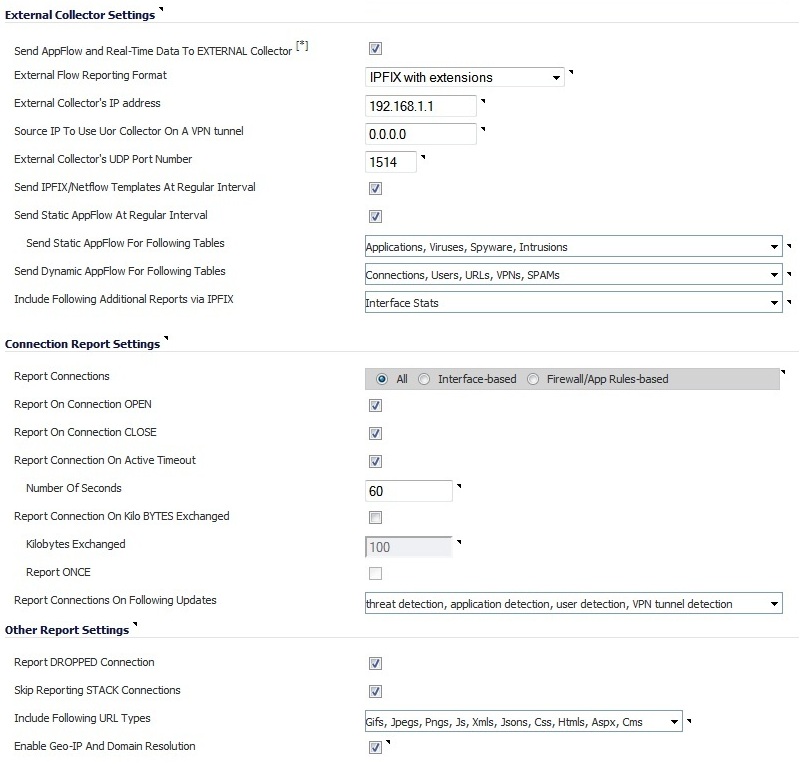
- Select 'Send AppFlow and Real-Time Data To EXTERNAL Collector' check box to enable flows to be reported to an external flow collector.
| Note: |
After enabling to send the data and completing the configuration, ensure that you restart the SonicWALL firewall device. Only after restart, the device will send the data to the external collector (i.e., the Firewall Analyzer).
|
- Select 'IPFIX with extensions' as the External Flow Reporting Type from the drop down list, if the Report to EXTERNAL flow collector option is selected. Next, specify the External Collector’s IP address (the IP address of the Firewall Analyzer) in the provided field
- To reach the external collector (i.e., the Firewall Analyzer) using a VPN tunnel, specify the Source IP of the VPN tunnel in the 'Source IP to Use for Collector on a VPN Tunnel' field.
- Specify the External Collector’s UDP port number (the UDP port number in which the Firewall Analyzer is listening, by default it is 1514) in the provided field
- Enable the option to Send templates at regular intervals by selecting the check box. After enabling this option, you can Generate ALL Templates by clicking the button in the topmost tool bar
- Enable the option to Send static flows at regular intervals by selecting the check box. After enabling this option, you can Generate Static Flows by clicking the button in the topmost tool bar
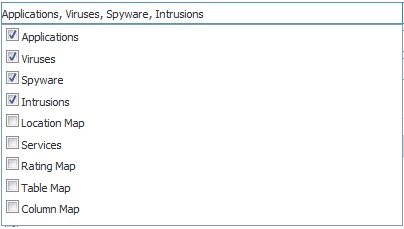
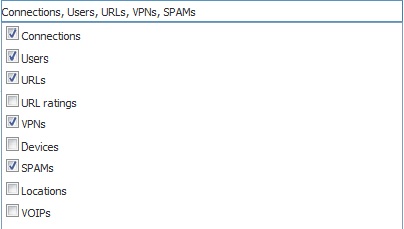
- Select the tables you wish to receive dynamic flows for from the drop down list.
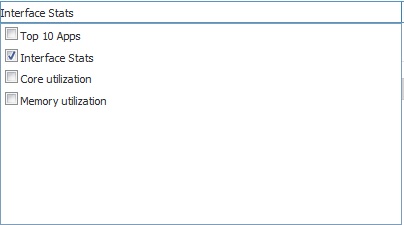
- Select any additional reports to be generated to a flow from the drop down list
Whenever you create or edit an access rule in the SonicWALL Firewall, ensure that 'Enable Flow Reporting' check box is selected for the particular rule.
How to enable application control in SonicWALL devices
Enable Application Control:
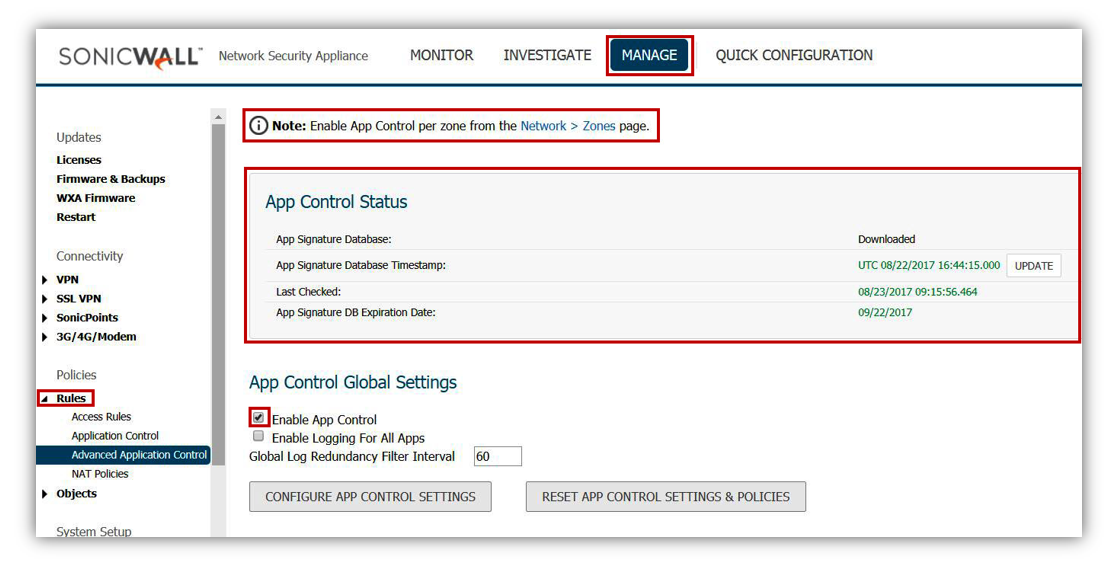
Login to your Sonicwall management page and click on Manage tab on top of the page,
- Navigate to Rules | Advanced Application Control page, on right side click Enable App Control checkbox under App Control Global Settings section.
- Click Accept button to save settings.
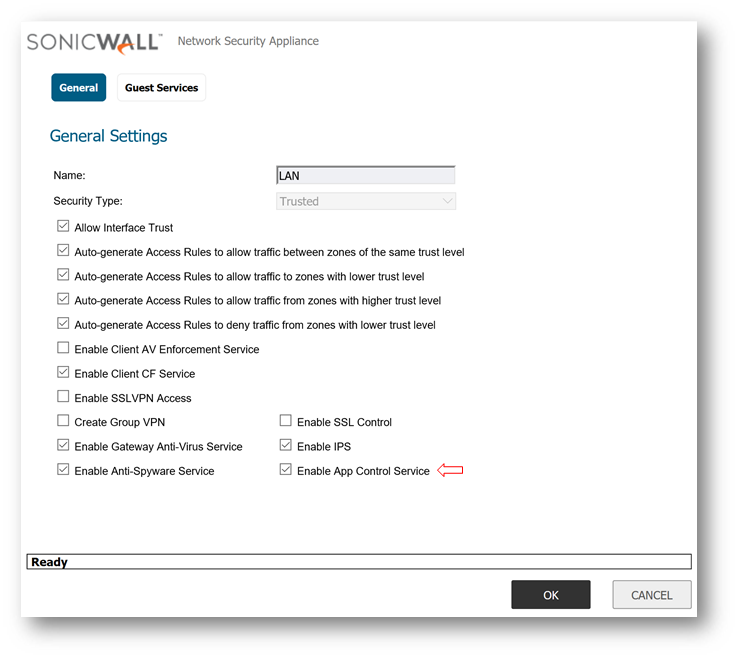
Note: Enable App Control per zone by checking the box under Enable App Control Service on each zone
Enabling Application Control on zones
- Navigate to Manage | Network | Zones
- Click on the configure button under the zone where you want enable App Control.
- Check Enable App Control Service.
- Click on OK to save.
